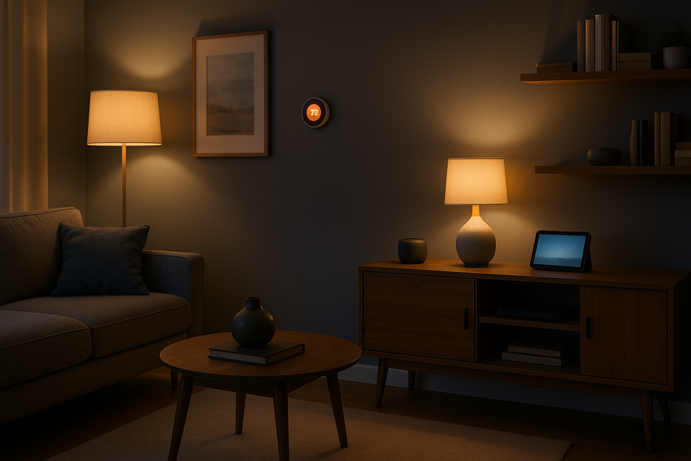
You’ve done your research, chosen your devices and they’re sitting in boxes on your kitchen counter. Now comes the part that actually matters – getting everything connected, configured and working reliably. You don’t need to be a networking expert, just willing to follow a process.
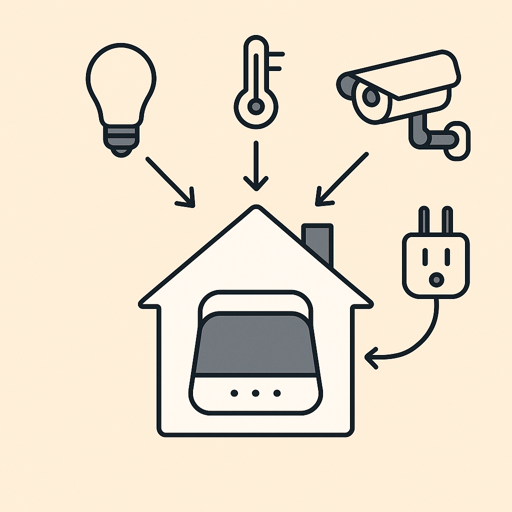
This guide is for DIYers ready to move beyond a couple of smart bulbs into a reliable whole home setup. You’ll learn how to assess and optimize your network, install devices correctly the first time, implement security measures and troubleshoot issues systematically. By the end, you’ll have a rock solid setup that actually stays connected.
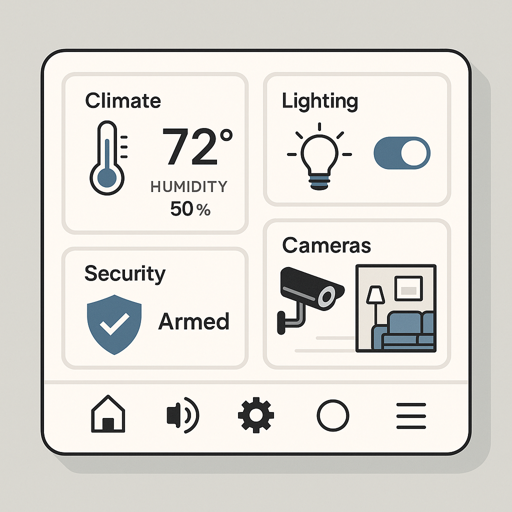
New to smart homes? Start with our Smart Home 101 Guide to understand the basics before diving into the installation.
Smart Home Network Setup: Pre-Installation Assessment
Smart home reliability starts with your network. Before connecting a single device, assess your Wi-Fi infrastructure.
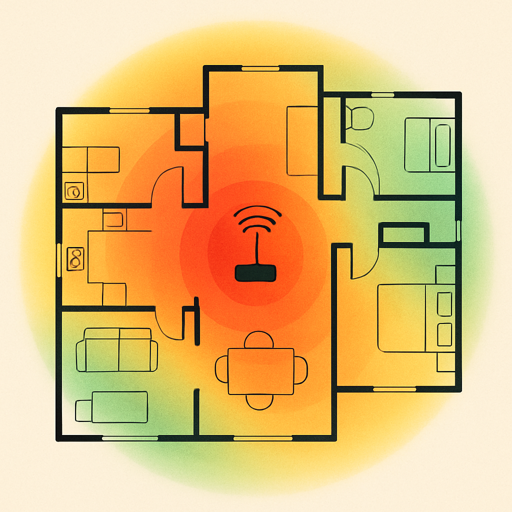
Test Your Wi-Fi Coverage
Download a Wi-Fi analyzer app (WiFi Analyzer for Android, Airport Utility for iOS) and walk through your home.
Quick Win: Stand where you plan to install each device and check signal strength right now. If it’s weak before installation, no amount of troubleshooting will make that device reliable later.
Pay attention to:
- Signal strength: Aim for -67 dBm or stronger where devices will be installed
- Dead zones: Areas with weak or no signal (basements, garages, far corners)
- Channel congestion: In apartment buildings, overlapping networks cause interference
Most smart home devices connect to 2.4 GHz Wi-Fi, which has better range but fewer channels than 5 GHz. Address signal strength below -70 dBm before installing devices.
Router Configuration
Access your router’s admin panel (commonly 192.168.1.1 or 192.168.0.1 – check your router’s label if these don’t work) and verify the settings below.
Separate 2.4 GHz and 5 GHz bands
Many routers use “band steering” to automatically switch devices between 2.4 GHz and 5 GHz, but this causes setup problems with some smart devices. Give your bands different names:
- YourNetwork-2.4
- YourNetwork-5
Select optimal channels
For 2.4 GHz, use channels 1, 6 or 11 (the only non-overlapping options). Your Wi-Fi analyzer shows which channels neighbors use. Pick the least congested.
Verify security settings
Use WPA3 if your router and devices support it. Most smart home devices still rely on WPA2-PSK with AES encryption, which remains secure. Avoid WEP or WPA with TKIP. WPA2/WPA3 transition mode typically works well, though you’re only as secure as the least secure protocol in use.
Disable AP isolation
AP isolation or client isolation prevents devices from communicating with each other, breaking smart home functionality. Ensure it’s turned off.
When to Upgrade Your Network
Consider upgrading if your router is 5+ years old, you have consistent dead zones, you’re installing 15+ devices or your home exceeds 2,000 square feet with multiple floors.
Single routers work for spaces under 1,500 sq ft. Look for Wi-Fi 6 (802.11ax) support.
Mesh systems solve coverage problems in larger homes. Eero, Google Wifi and ASUS ZenWiFi create seamless coverage with multiple access points. Devices automatically connect to the strongest signal.
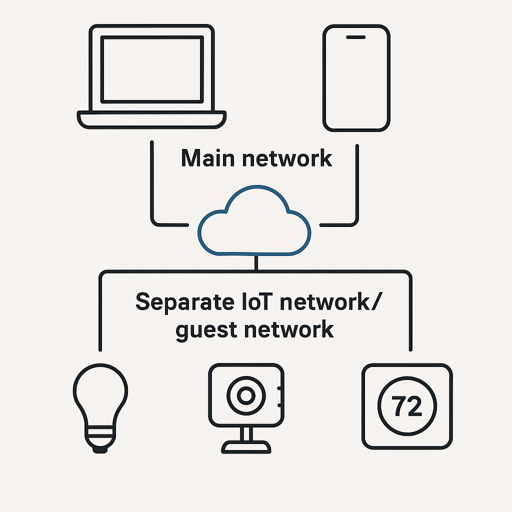
Network Segmentation for Smart Home Devices
Isolating smart home devices on a separate network improves security and simplifies troubleshooting. If one device gets compromised, it can’t access your computers or phones.
Guest Network Method (Easiest)
Most routers have a built-in guest network that’s isolated from your main network by default.
Setup Steps
- Enable guest network in router settings
- Name it something obvious (e.g. SmartHome-IoT)
- Use a different password than your main network
- Disable client isolation (devices need to communicate)
- Connect all smart devices to this network
Note: Some routers block communication between main and guest networks. If you can’t discover devices during setup, temporarily connect your phone to the guest network, complete setup, then switch back. Cloud based control works across network boundaries once configured. Some routers enforce strict isolation with no option to disable it – if your devices require local control, you may need to use your main network instead of the guest one.
VLAN Method (Advanced)
VLANs (Virtual Local Area Networks) offer granular control for users with managed network equipment. You can create multiple isolated networks, set custom firewall rules and prioritize certain types of traffic. This requires enterprise grade equipment (UniFi, TP-Link Omada) and networking knowledge.
Device Installation Procedures
Follow this systematic approach to avoid having to redo setups.
Pre-Installation Checklist
Before opening any box:
- Verify ecosystem compatibility (Alexa or Google Home or HomeKit)
- Check protocol requirements (Zigbee and Z-Wave need hubs)
- Test signal strength at placement location
- Download manufacturer and ecosystem apps
- Have Wi-Fi password and account logins ready
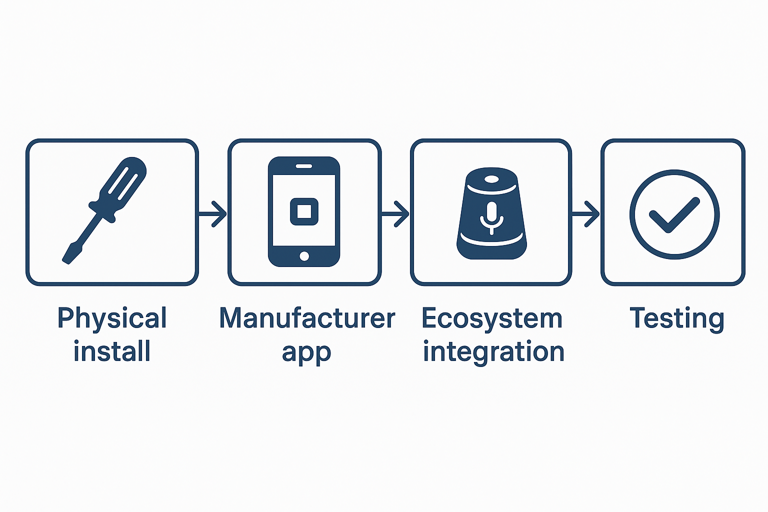
Standard Installation Sequence
Step 1: Physical installation
Install the device in its location. For hardwired installations (switches, thermostats), turn off power at the breaker first. Test basic functionality before network setup.
Step 2: Manufacturer app setup
Always configure through the manufacturer’s app first, as it offers more options and firmware update capabilities.
- Open manufacturer app and create account
- Select “Add Device”
- Follow pairing instructions
- Connect to Wi-Fi network
- Name descriptively (location + function: “Living Room Lamp”)
- Complete firmware updates before proceeding
Step 3: Ecosystem integration
Once working in manufacturer app, add to your ecosystem.
Alexa: More → Skills & Games → Search manufacturer → Enable skill → Devices → + → Discover
Google Home: + → Set up device → Works with Google → Search manufacturer
HomeKit: Home app → + → Add Accessory → Scan HomeKit code
Step 4: Test
- Test ecosystem app controls
- Test voice commands
- Verify 1-2 second response time
- Confirm status updates correctly
Device-Specific Installation Notes
Smart Bulbs
Install where wall switches stay “on.” If someone flips the switch, the bulb loses power.
Common Mistake: Installing smart bulbs in fixtures with switches that family members habitually flip. Once off, your “smart” bulb is just an expensive regular bulb. Use smart switches for high traffic locations.
Smart Switches
Most need neutral wires (white). Check load compatibility, multi-way circuit requirements and box depth. Professional installation typically runs $75-150 per switch in most US markets if you’re uncomfortable with electrical work.
Smart Thermostats
Verify HVAC compatibility before buying. Check C-wire presence, use manufacturer compatibility checkers, understand your system type. Installation takes 30-60 minutes for standard systems. Complex systems may need professional help.
Battery Devices
Placement affects battery life. Strong Wi-Fi conserves power, extreme temperatures drain faster, high traffic sensors trigger more frequently. Use rechargeables for 3-6 month devices, alkaline for 1-2 year sensors.
Firmware Updates and Maintenance
Keep firmware current to prevent security vulnerabilities and ensure optimal performance.
Enable Automatic Updates
Router: Enable auto-update, schedule for 2-4 AM. Updates cause 3-5 minute outages.
Hubs: Echo, Nest and HomePod update automatically during low usage periods.
Devices: Check manufacturer apps for auto-update settings. Some devices can auto-update, whereas others need manual updates.
Maintenance Schedule
Weekly: Verify devices show “online,” check battery warnings
Monthly: Review automation logs, replace low batteries, check updates, test critical automations
Quarterly: Adjust schedules for seasons, audit user access, restart router/hubs, clean cameras
Annually: Change passwords, remove unused devices, assess network performance, back up configurations
Troubleshooting Common Smart Home Installation Issues
Most smart home problems come down to a handful of predictable causes. Fix those and the rest usually falls nicely into place.
Device Won’t Connect to Wi-Fi
Troubleshooting steps
- Verify 2.4 GHz network (not 5 GHz)
- Re-enter Wi-Fi password carefully
- Disable VPN on your phone
- Move within 10 feet of router
- Check MAC filtering isn’t blocking device
- Try guest network
- Restart router, wait 2 minutes
- Factory reset device
Device Keeps Going Offline
If your device disappears every evening and reappears after router reboot, you’re dealing with weak signal or DHCP issues.
Troubleshooting steps
- Check signal strength (-75 dBm or worse causes disconnections)
- Move away from microwaves, baby monitors, cordless phones
- Increase DHCP lease time to 24+ hours
- Assign static IP address
- Update firmware
- Check device limits (routers struggle with 50+ devices)
Slow Response Times
- Test internet speed (5+ Mbps upload recommended)
- Restart router and devices
- Check manufacturer cloud status
- Reduce network congestion
- Consider local control options
Voice Commands Not Working
- Run device discovery to refresh list
- Rename to simple names without special characters
- Assign to proper rooms
- Unlink and relink manufacturer’s skill
- Test manual control (if app works but voice doesn’t, it’s integration)
Automation Not Triggering
- Verify automation is enabled
- Ensure all conditions are met
- Test individual devices manually
- Simplify complex automations
- Check execution logs
- Add 1-2 second delays between actions
Smart Home Security Configuration
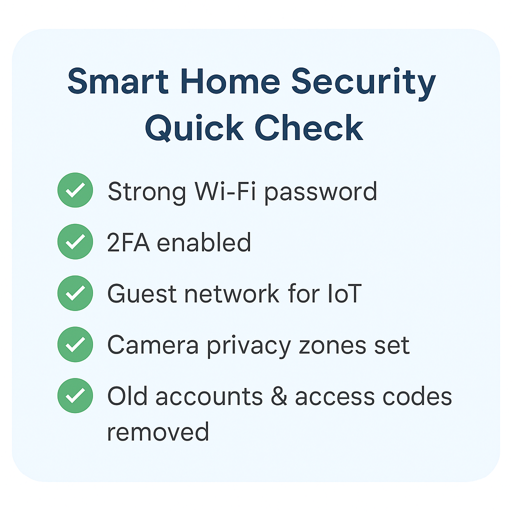
Account Security
- Use unique passwords for each account
- Enable two-factor authentication
- Store passwords in password manager
- Use guest accounts for temporary access
- Audit and revoke unused permissions
Device Security
Cameras: Enable encryption, set privacy zones, configure home/away modes, minimize recording retention, disable microphones when not needed
Smart locks: Require PIN/biometric for remote unlock, enable auto-lock, set notifications for all events, create unique access codes, remove old codes
Privacy Settings
- Minimize data sharing
- Disable voice recording storage
- Opt out of analytics
- Disable advertising personalization
- Enable location only for geofencing/weather
Advanced Configuration
Local Control Options
Future Proofing Note: Consider Matter compatible devices if starting fresh. This emerging standard works across ecosystems with more resilient local control, though device selection remains limited for the time being.
Home Assistant: Open source platform with 2,000+ integrations. Requires technical knowledge.
Hubitat Elevation: Commercial local controller with Zigbee/Z-Wave built-in. Easier than Home Assistant, works during outages.
Apple HomeKit: Processes automations locally on HomePod/Apple TV. Limited to HomeKit certified devices.
Documentation
Create device inventory (names, models, locations, purchase dates, warranties), document automation logic, sketch network diagram. Store credentials in password manager.
When to Call Professional Help
- Electrical: If you see tangled wiring with no neutral wire, call an electrician
- HVAC: Complex thermostat installations, zoned systems, smart vents
- Network: Ethernet through walls, enterprise equipment, VLANs, whole home redesigns
- Security: Professional monitoring, wired cameras, alarm integration
Professional installation typically costs $75-150 per hour in most US markets.
Quick Installation Checklist
- Test Wi-Fi coverage, fix dead zones
- Segment network (guest network or VLAN)
- Install via manufacturer app first
- Name devices clearly (location + function)
- Enable automatic updates
- Configure security (2FA, passwords, privacy)
- Document everything
- Test thoroughly
Frequently Asked Questions
How do I set up my smart home network for the first time?
Test Wi-Fi coverage with an analyzer app. Address dead zones with mesh nodes or extenders. Configure strong security (WPA2/WPA3), separate 2.4 GHz and 5 GHz networks and create a guest network for smart devices. Verify signal strength is -67 dBm or better where devices install.
Should smart home devices be on a separate network?
Ideally, yes. Network segmentation improves security and troubleshooting. A properly isolated guest network can keep compromised devices from accessing your computers and phones. For advanced users, VLANs offer more control. Ensure the network allows device-to-device communication for local control.
Why do my smart home devices keep going offline?
Common causes: weak Wi-Fi signal, interference, short DHCP lease times, outdated firmware. Check signal strength (should be -70 dBm or stronger), move away from interference sources, increase DHCP lease to 24+ hours, update firmware.
Do I need a mesh Wi-Fi system for my smart home?
Mesh helps in homes over 2,000 sq ft, multi-story layouts or with persistent dead zones. Single routers work for smaller spaces. The key is ensuring strong signal (-67 dBm or better) where devices are installed, regardless of system type.
How can I secure my smart home devices from hackers?
Use unique passwords and enable 2FA. Keep firmware updated automatically. Segment devices on separate network. Minimize data collection. For cameras, enable encryption, set privacy zones, disable recording when home. Regularly audit access.
What’s the best order to install smart home devices?
Start with network infrastructure (router optimization, mesh if needed). Install hub or voice assistant. Add devices one at a time, fully configuring each through manufacturer app before proceeding. This makes troubleshooting easier.
Building Your Smart Home Foundation
Smart home installation success comes down to preparation and attention to detail. A solid network foundation, systematic device setup and proper security configuration create a reliable system requiring minimal ongoing attention.
Start with network infrastructure, properly configure each device and document your setup. The extra effort during installation pays dividends through years of reliable operation.
For understanding smart home fundamentals and choosing devices, see our Smart Home 101 guide.